Installation & Setup Guide
Just a few steps to begin your mathematical art creation journey.
This guide will walk you through the installation, environment configuration, and Pro version activation of MathArt, ensuring you can seamlessly access all advanced features.
💻 1. System Installation
MacOS Users
Download: Download the
.dmginstallation package for your system.Run the Install Script: After mounting the
.dmgfile by double-clicking it, double-click installed.command to run the installation script.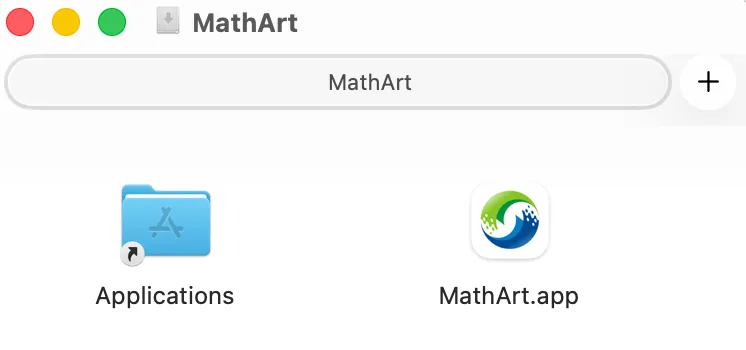
Drag to Applications: In the dialog that appears, drag MathArt.app into the Applications folder to complete the installation.
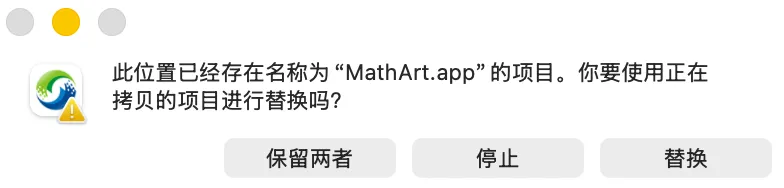
If an older version is already installed, a dialog will prompt you to overwrite — select Replace.
Starting from v1.4.21, the MacOS build is officially signed and notarized by Apple, so you should no longer encounter privacy or security blocking prompts.
Windows Users
Download: Download the
.exeinstallation package for your system.Run the Install Wizard: Double-click the
.exefile and follow the installation wizard prompts. It is recommended to keep the default installation path.
🛠 2. Required Component Setup (FFmpeg)
To enable high-quality video export, MathArt depends on the FFmpeg component. Configure it as follows for first-time use:
Download FFmpeg: Visit ffmpeg.org/download and download the version for your operating system.
Configure Environment Variables: Add FFmpeg's
bindirectory to your system'sPATHenvironment variable.If you are unfamiliar with configuring environment variables, contact technical support for a one-click setup script.
🔑 3. Activate Pro Version
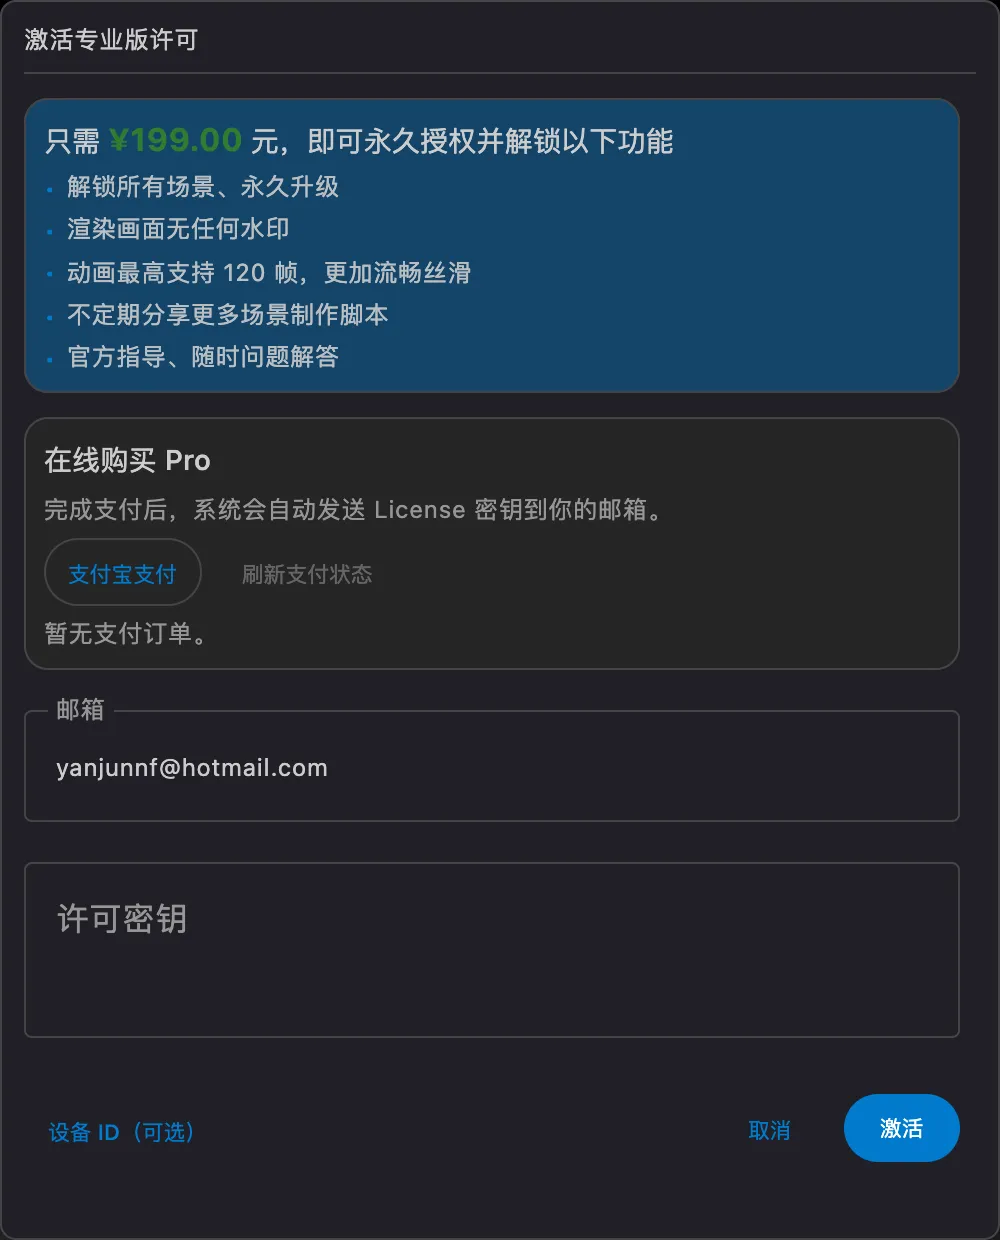
MathArt Pro offers the following exclusive benefits:
- Unlock all nine scenes, with permanent upgrades
- Render images and export videos without watermarks
- Animation support up to 120 FPS for buttery-smooth motion
- Periodic sharing of additional creation scripts and assets
- Official technical support with prompt issue resolution
3.1 Online Purchase & Activation (Recommended)
You can complete your purchase directly within the software — no need to contact support separately:
Open the Activation Window: Click the key icon or Pro badge in the upper-right corner of the main interface.

Enter Your Email: In the activation window, enter your email address in the Email field.
Note: Please ensure your email address is correct, otherwise you will not receive the activation code email.
Choose a Plan: In the activation window's online purchase Pro card, click the Alipay payment button.
Placeholder: replace with a screenshot of the plan selection interface
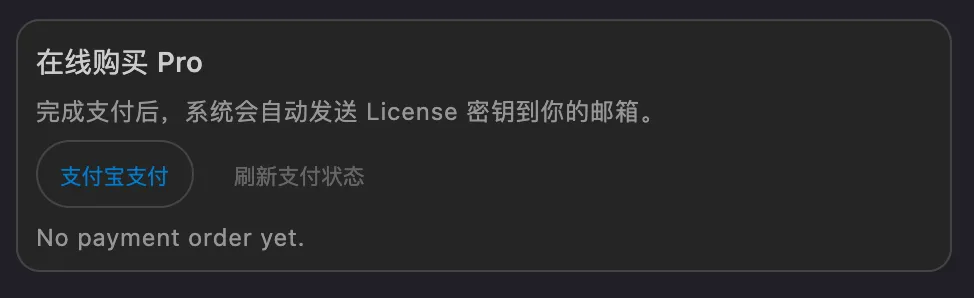
Complete Online Payment: The system will automatically open the payment page in your browser. Complete the payment process via Alipay. Once payment is confirmed, you will receive an activation code via email.
Activation Confirmed: After successful activation, you will see the Pro badge displayed in the main interface title bar — all advanced features take effect immediately.
3.2 License Key Activation
If you have already obtained a License Key through other channels, follow these steps:
Open the Activation Window: Click the key icon or Pro badge in the upper-right corner of the main interface.
Enter Your Email: In the activation window, enter your email address in the Email field.
Enter the License Key: Paste your License Key into the input field and click the Activate button.
Activation Confirmed: After verification, you will see the "Pro Version Unlocked" message.
⚙️ 4. Recommended First-Run Settings
For the best visual experience and export quality, we recommend configuring the following settings before you begin creating:
Open the Settings Panel: Click the Settings button in the upper-right corner of the interface.

Adjust Rendering Parameters:
Parameter Recommended Value Description Frame Rate (FPS) 60 Ensures silky-smooth animations Render Quality High Enables anti-aliasing and high-precision rendering Output Directory A folder with ample free space Ensures sufficient storage for video exports 
Save Settings: Click OK to save all configurations.
🎉 Congratulations! You have completed all preparations.
Now, proceed to the Quick Start chapter and create your first mathematical animation!