Spirograph Scene
📋 Overview
The Spirograph is a classic mathematical drawing tool that creates intricate geometric patterns through the combination of gears and disks. MathArt digitizes this classic tool, allowing you to explore and create stunning spirograph art in real-time.
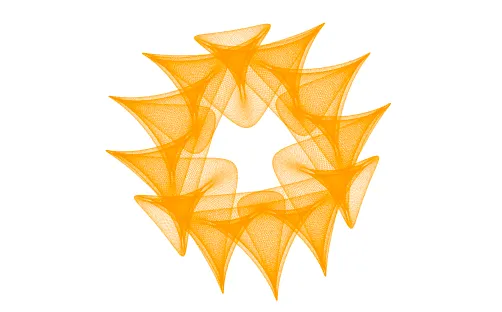
The Spirograph is based on the mathematical principle of roulettes. When a circle rolls inside or outside another circle, a fixed point on the rolling circle traces out elegant curves. By adjusting the radius ratios and pen position, you can create infinitely many unique patterns.
🧮 Mathematical Principles
Basic Concepts
The mathematical foundation of the Spirograph involves several core concepts:
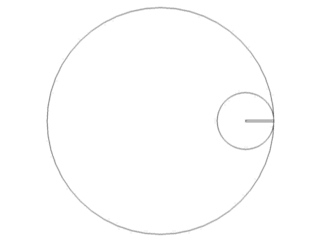
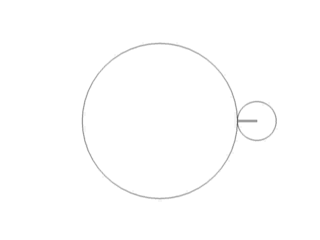
Stator
The stator is the fixed circle that serves as the reference for the entire spirograph system. The motion of the rotor is based on the stator's radius.
- The stator radius determines the overall size of the pattern
- The stator is the reference frame for all motion
Rotor
The rotor is the circle that rolls on the stator. The rotor can operate in two modes:
- Inside Mode: The rotor rolls inside the stator, producing a hypotrochoid
- Outside Mode: The rotor rolls outside the stator, producing an epitrochoid
Pen Distance
Pen distance refers to the distance from the drawing point to the rotor's center. This parameter determines the shape characteristics of the pattern:
- Pen distance = 0: The pattern degenerates into a circle
- Pen distance < rotor radius: The pattern shows smooth curves
- Pen distance > rotor radius: The pattern develops cusps and loops
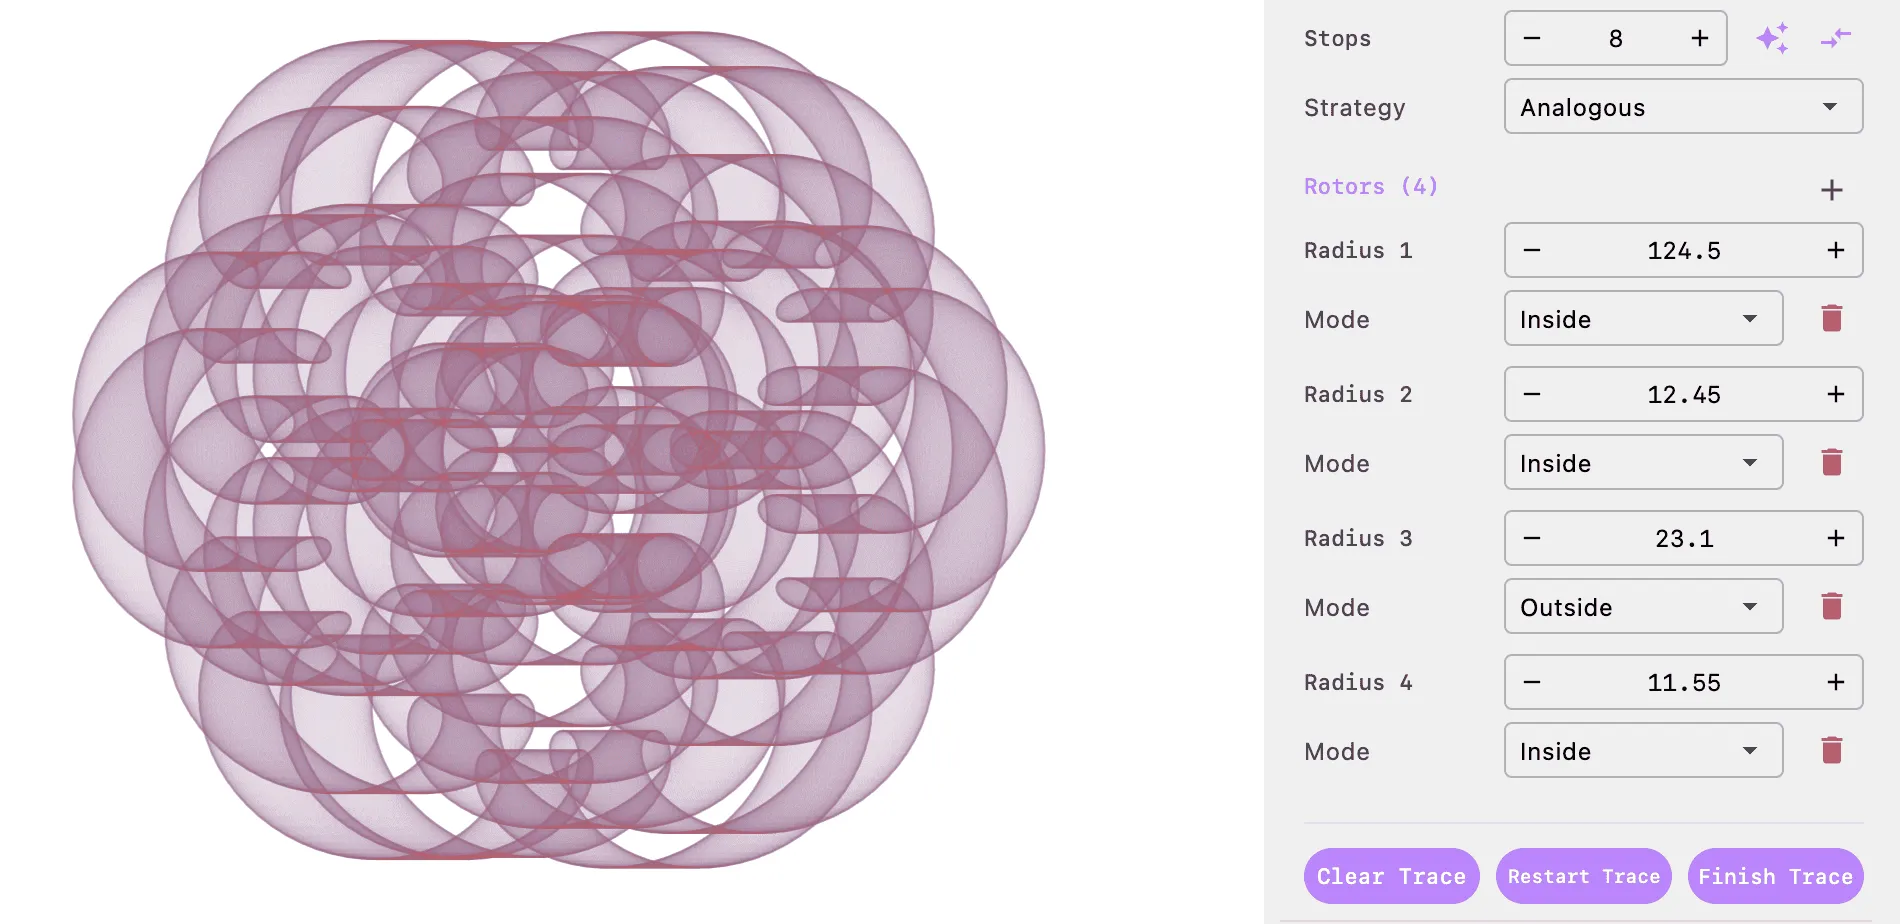
Multi-Rotor System
MathArt supports a multi-rotor system, which is a powerful extension of the traditional spirograph. When multiple rotors are added:
- The first rotor rolls on the stator
- The second rotor rolls on the first rotor
- And so on...
Each rotor can have its own radius and motion mode, creating extremely complex and beautiful patterns.
Pattern Closure
An important property of spirograph patterns is closure. After the rotor completes several rotations, the pattern returns to its starting point, forming a closed curve. The number of rotations required for closure depends on the radius ratio of the stator and rotor:
- If the radius ratio is a rational number, the pattern will close after a finite number of rotations
- The number of rotations for closure is determined by the denominator of the radius ratio
Note: MathArt automatically calculates the closure point of the pattern and, when "Auto Stop" is enabled, stops drawing when the pattern closes.
🚀 Quick Start
Creating Your First Spirograph
Select Scene: Choose "Spirograph" from the scene selector
Adjust Basic Parameters:
- Set stator radius (e.g., 150)
- Set pen distance (e.g., 75)
- Add a rotor with radius (e.g., 75) and mode (Inside)
Watch the Drawing: Click the play button to watch the spirograph draw in real-time
[Screenshot placeholder: Showing basic parameter settings in the inspector panel]
That's it! You've created your first spirograph artwork. Now, let's dive deeper into each setting option.
🔄 Scene Transform Settings
Scene transform settings control the position, rotation, and scale of the entire spirograph on the canvas.
Offset
- Offset X: Horizontal offset, positive values move right
- Offset Y: Vertical offset, positive values move down
💡 Tip: Use offset to position the spirograph at a specific location on the canvas for better composition.
Scene Rotation
- Controls the rotation angle of the entire scene
- Unit: degrees (°)
- Positive values rotate clockwise, negative values rotate counter-clockwise
Scene Scale
- Controls the scale ratio of the entire scene
- Default: 1.0
- Minimum: 0.01
Note: Scene scale affects all layers. To scale individual layers, adjust that layer's parameters instead.
🎬 Animation Settings
Animation settings control the dynamic effects during the spirograph drawing process.
Easing Effects
Start Ease
- When enabled, the drawing speed gradually accelerates from zero at the start
- Makes the drawing process smoother and more natural
- Avoids visual jumps from sudden starts
End Ease
- When enabled, the drawing speed gradually decelerates as the pattern approaches closure
- Makes pattern closure smoother
- Avoids visual jumps from sudden stops
Fade Effects
Fade In Stators On Start
- When enabled, the guide circles for stator and rotors fade in at the start of drawing
- Enhances visual effect, making the appearance of guide lines more natural
Fade Out Stators On Finish
- When enabled, the guide circles for stator and rotors fade out after drawing completes
- Makes the final image cleaner, highlighting the drawn pattern
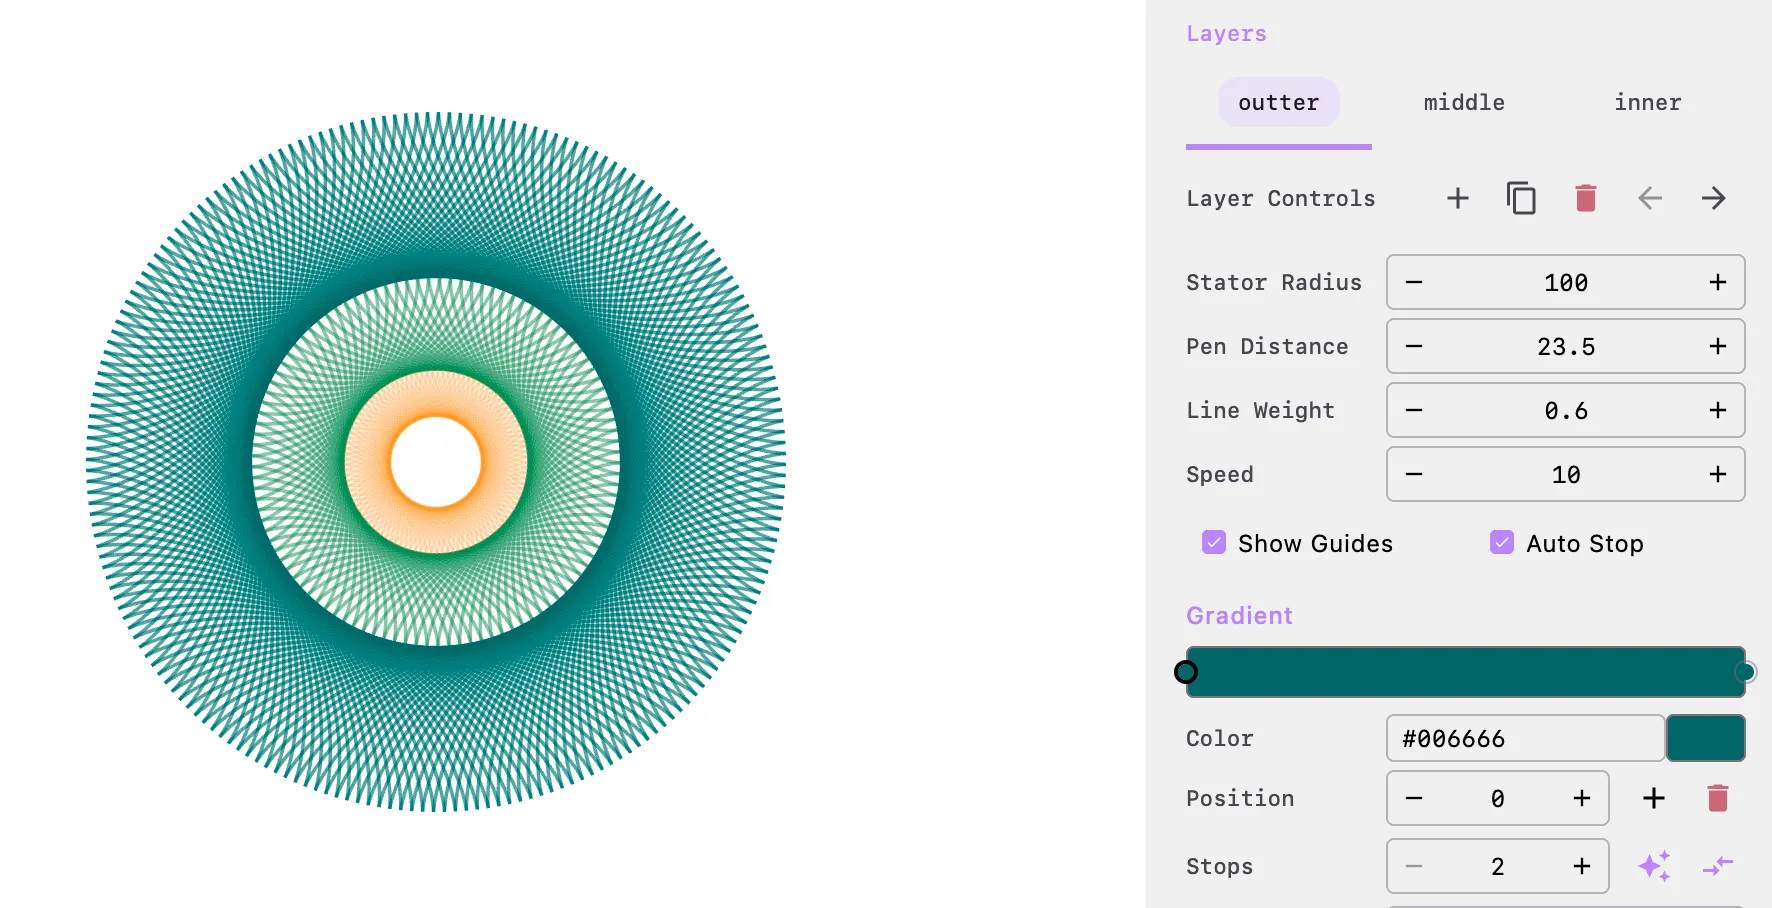
📐 Layer Settings
MathArt supports a multi-layer system where each layer can be independently configured to draw different spirograph patterns.
Layer Management
 For specific parameter configuration, refer to the built-in Spirograph scene "wormhole"
- Add Layer: Click the "+" button to add a new layer
- Duplicate Layer: Click the duplicate button to copy the current layer
- Delete Layer: Click the delete button to remove the current layer (minimum one layer required)
- Move Layer: Use the left/right arrow buttons to adjust layer order
- Rename Layer: Double-click the layer tab to rename
Note: Layers are drawn from bottom to top. Later layers will cover earlier layers.
Layer Parameters
Stator Radius
- Defines the stator radius for this layer
- Unit: pixels
- Minimum: 1.0
- Affects the overall size and shape of the pattern
Pen Distance
- Defines the distance from the drawing point to the rotor's center
- Unit: pixels
- Minimum: 0.0
- Affects the shape characteristics of the pattern (smooth curves vs. cusps and loops)
[Screenshot placeholder: Showing comparison of different pen distance values]
Line Weight
- Defines the thickness of the drawing line
- Unit: pixels
- Minimum: 0.1
- Thicker lines suit larger patterns, thinner lines suit fine details
Speed
- Defines the drawing speed
- Higher values mean faster drawing
- Minimum: 0.01
Note: Excessive speed may cause loss of pattern detail. Use moderate speed during exploration and adjust as needed for final rendering.
Show Guides
- When enabled, displays guide circles for the stator and rotors
- Guide lines help understand the pattern generation process
- Very useful for educational demonstrations
Auto Stop
- When enabled, automatically stops drawing when the pattern closes
- When disabled, the pattern draws infinitely in a loop
- Recommended to enable for complete closed patterns
[Screenshot placeholder: Showing guide lines and auto stop effects]
🎨 Gradient Settings
Gradient settings control the color of the spirograph lines, allowing you to create single-color or multi-color gradient effects.
Palette Editor
[Screenshot placeholder: Showing palette editor interface]
- Color Stops: Supports multiple color stops to create gradient effects
- Add Color: Click on the area below the palette to add a new color
- Delete Color: Select a color stop and click the delete button
- Adjust Color: Click a color block to open the color picker
- Adjust Position: Drag color stops to change their position in the gradient
💡 Tips:
- Use high-contrast colors to highlight pattern layers
- Adjacent similar tones create smooth transition effects
- Gradient colors are applied sequentially along the drawing path
Random Palette
MathArt provides powerful random palette generation to help you quickly create harmonious color schemes.
Random Color Count
- Sets the number of colors to generate
- Range: 2-16
- After clicking the generate button, the specified number of colors will be automatically created
Color Strategy
[Screenshot placeholder: Showing comparison of different color strategy effects]
Monochromatic
- Based on a single hue, creating colors through lightness and saturation variations
- Suitable for creating unified, harmonious visual effects
Analogous
- Uses adjacent colors on the color wheel
- Creates natural, comfortable visual sensations
Complementary
- Uses two opposite colors on the color wheel and their variations
- Creates strong contrast effects
Split Complementary
- Uses a main color and the two colors adjacent to its complement on the color wheel
- Provides both contrast and harmony
Split Complementary Settings
When selecting "Split Complementary" strategy, you can further configure:
- Main Tone Count: Sets the number of main tones (3-6)
- Main Tone Colors: Manually adjust the color of each main tone
- Randomize Button: Click the random button to generate new main tone combinations
[Screenshot placeholder: Showing split complementary settings interface]
Color Reverse
Click the reverse button to reverse the order of colors in the palette for a quick different visual effect.
⚡ Rotor Settings
Rotors are the core components of the spirograph, determining the basic form of the pattern.
Adding and Removing Rotors
- Add Rotor: Click the "+" button above the rotor list
- Remove Rotor: Click the delete button on the right side of the rotor (minimum one rotor required)
Note: Adding multiple rotors creates more complex patterns but also increases computational complexity.
Rotor Parameters
[Screenshot placeholder: Showing rotor parameter settings interface]
Rotor Radius
- Defines the rotor's radius
- Unit: pixels
- Minimum: 1.0
- The ratio of rotor radius to stator radius determines the basic shape of the pattern
Rotor Mode
Inside: The rotor rolls inside the stator
- Produces a hypotrochoid
- Pattern is more compact and inward
Outside: The rotor rolls outside the stator
- Produces an epitrochoid
- Pattern is more extended and outward
[Screenshot placeholder: Showing comparison of inside and outside mode effects]
Multi-Rotor Combination Tips
💡 Tips:
- Symmetrical Patterns: Use rotors with the same radius, alternating between inside and outside modes
- Complex Patterns: Use rotors with different radii to create richly layered patterns
- Gradient Effects: Gradually increase or decrease rotor radii to create gradient effects
[Screenshot placeholder: Showing effects of different rotor combinations]
🎛️ Control Buttons
At the bottom of the inspector panel, three control buttons are provided:
Clear Trace
- Clears the currently drawn trace
- Preserves all parameter settings
- Allows restarting the drawing
Restart Trace
- Clears the trace and starts drawing from the beginning
- Equivalent to resetting the drawing state
Finish Trace
- Immediately completes the current trace drawing
- Skips the drawing animation and displays the complete pattern directly
- Suitable for quick preview of the final result
[Screenshot placeholder: Showing the location of control buttons]
🎞️ Animation Types
MathArt provides specialized animation types for the Spirograph scene that can be used in the timeline.
Rotate Animation (SpirographRotateAnimation)
Makes the entire spirograph rotate during or after drawing.
Parameters:
- Duration: Animation duration
- Target Rotation Rate: The speed of rotation
Use Cases:
- Add dynamic effects to static patterns
- Create rotating spirograph animations
- Combine with drawing animations for composite effects
[Screenshot placeholder: Showing rotation animation effect]
Finish Wait Animation (SpirographFinishWaitAnimation)
Waits for the spirograph to finish drawing before continuing with subsequent animations.
Parameters:
- Duration: Maximum wait time (fallback limit)
Features:
- Prioritizes the visual completion state of the spirograph
- Ends when the pattern closes or the maximum wait time is reached
- Prevents timeline from getting stuck due to abnormal configurations
Use Cases:
- Ensure the spirograph is fully drawn before executing other animations
- Coordinate with camera animations, fade effects, etc.
- Create complete animation sequences
[Screenshot placeholder: Showing animation configuration in timeline]
💡 Advanced Tips
Creating Classic Patterns
Rose Curve
- Stator radius: 150
- Rotor radius: 75 (Inside)
- Pen distance: 75
- Feature: Produces petal-like patterns
Star Pattern
- Stator radius: 150
- Rotor radius: 50 (Inside)
- Pen distance: 60
- Feature: Produces star-shaped patterns with sharp points
Complex Spiral
- Stator radius: 150
- Rotor 1: 75 (Inside)
- Rotor 2: 30 (Outside)
- Pen distance: 40
- Feature: Produces complex nested spiral patterns
[Screenshot placeholder: Showing classic pattern examples]
Performance Optimization Suggestions
- Guide Lines: Turn off guide lines for final rendering to get a cleaner image
- Speed: Use higher speed during exploration, lower speed for final rendering for smoother animation
- Layers: Use layers reasonably, avoid too many overlapping layers affecting performance
- Gradient: Using fewer color stops can improve rendering efficiency
Creative Inspiration
- Mathematics Education: Demonstrate the mathematical principles of roulettes to help students understand geometric concepts
- Artistic Creation: Combine multiple layers and gradients to create unique abstract artworks
- Animation Production: Coordinate with rotation and camera animations to create dynamic mathematical art videos
- Pattern Design: Export patterns for textile, wallpaper, and other design fields
FAQ
Q: Why doesn't my pattern close?
A: Possible reasons:
- "Auto Stop" option is not enabled
- Radius ratio results in too many rotations for closure
- Insufficient drawing time
Solution: Enable the "Auto Stop" option, or use the "Finish Trace" button to complete drawing immediately.
Q: How do I create symmetrical patterns?
A: Try these methods:
- Use rational radius ratios
- Use layers with the same parameters but different colors
- Use scene rotation to create rotational symmetry
Q: The pattern is too complex to see details clearly. What should I do?
A: Suggestions:
- Increase scene scale
- Reduce the number of rotors
- Use thicker lines
- Adjust pen distance parameter
Q: How can I make the pattern more layered?
A: Try:
- Use multiple layers, each with different parameters
- Use gradient colors to let colors change along the path
- Adjust line weight to create thickness contrast
- Use semi-transparent colors to let layers overlap
📚 Next Steps
- Explore other scene types: Fractal, Parametric Surface, Implicit Surface, Strange Attractor, Perlin Noise
- Learn Core Features for more advanced techniques
- Check Interface Guide to familiarize yourself with all panels and tools
💡 Tip: Spirograph art is a field full of possibilities. Try different parameter combinations, and you'll find that every setting brings unexpected surprises!