Quick Start — Create Your First MathArt Animation (5 minutes)
From zero to a parametrized surface: a short hands-on tutorial.
This tutorial walks through creating a simple parametric surface scene and exporting a video. Follow the steps — no prior experience required.
🎬 Step 1 — Select a Model
Start MathArt Studio.
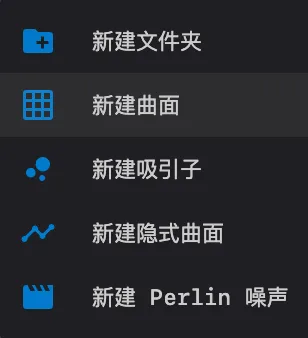
In the left Scene List, right-click My Scenes and choose New Surface.
Enter a scene name (for example:
test).
Note:
On the left side of the main interface are the files and folders containing preset models such as Surface Example, Attractor Example, Implicit Example, etc. in the scene list, which are read-only and cannot be directly modified.
🎨 Step 2 — Tweak Parameters
Open the Inspector (right panel) and edit the following sections.
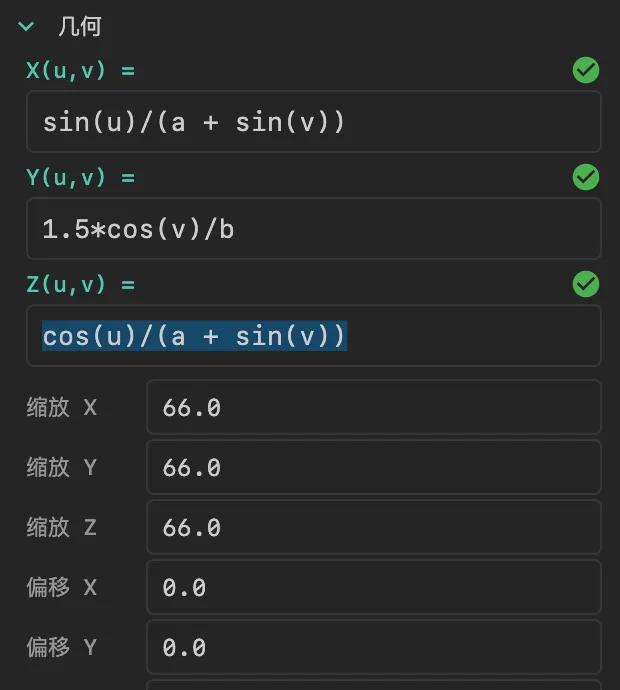
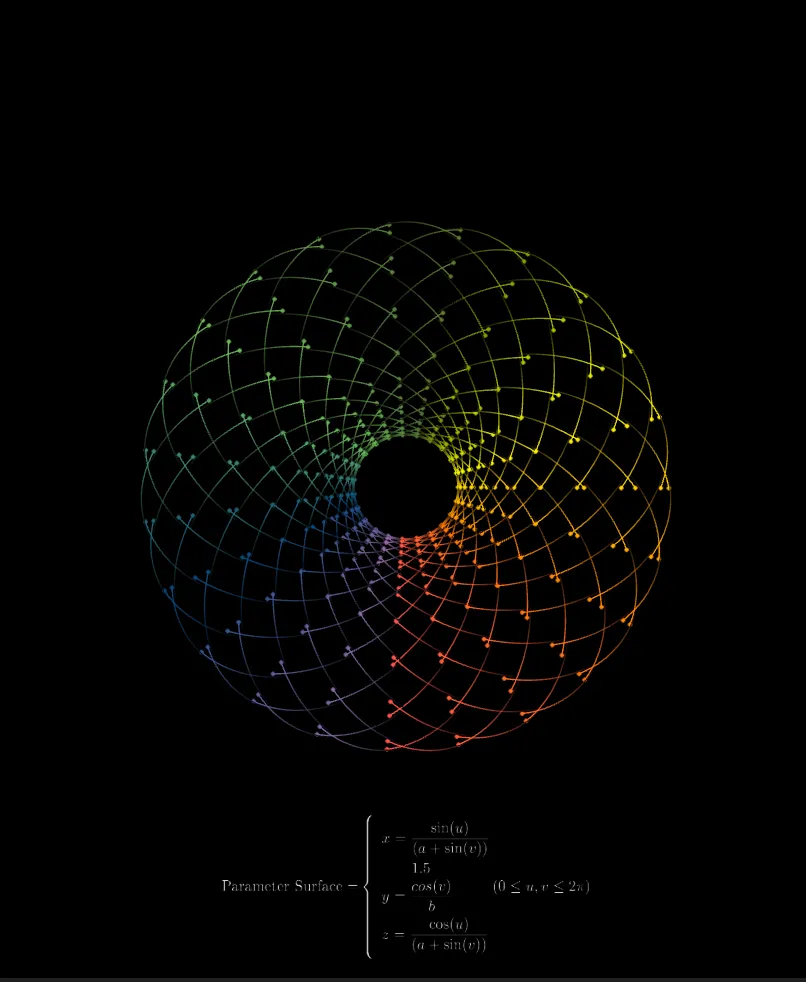
In Geometry, enter formulas (example):
x(u,v) = sin(u) / (a + sin(v))y(u,v) = 1.5 * cos(v) / bz(u,v) = cos(u) / (a + sin(v))Set Scale:X = 66,Y = 66,Z = 66.
In Parameters, enter values for parameters used in the formulas, then click Apply to update the scene.

Note: changes take effect only after clicking Apply.
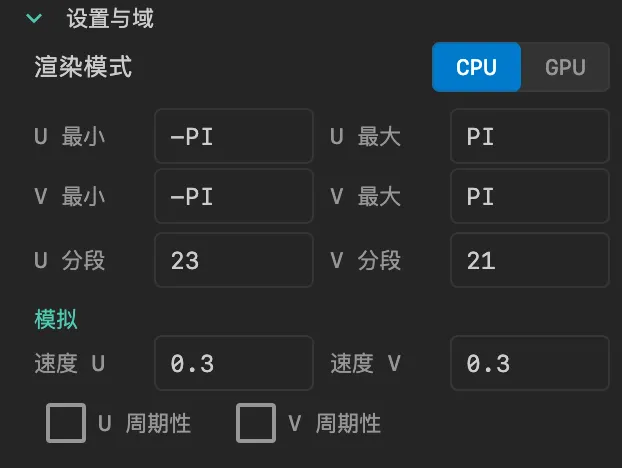
Configure domain settings (U/V ranges and resolution):
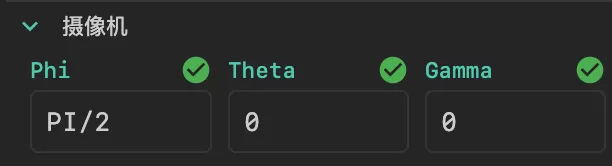
Adjust camera initial values if desired:
Tune appearance (palette, line weight, dot size):

🎥 Step 3 — Play the Scene
Click the ▶️ Play button on the toolbar to start the animation.
🎞 Step 4 — Add Animation on the Timeline
Open the Timeline (bottom panel). There is usually a default Wait clip that runs after scene load.
From the toolbar above the timeline, drag an Animate clip down onto a track.
A semi-transparent preview appears while dragging; release to place a blue clip on the track.
Select the clip and edit its properties in the right-side inspector to set animation parameters:
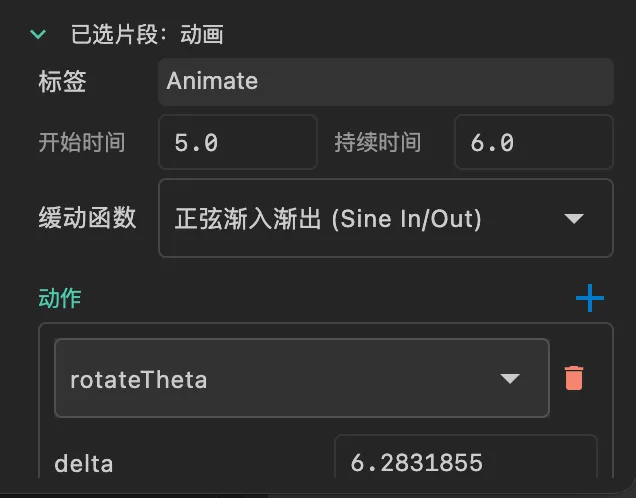
Click the ▶️ Play button above the timeline to preview — the parametric surface will begin rotating.
📤 Step 5 — Record Video
Click the Record button in the toolbar to begin recording.

In the recording dialog you can set export options:
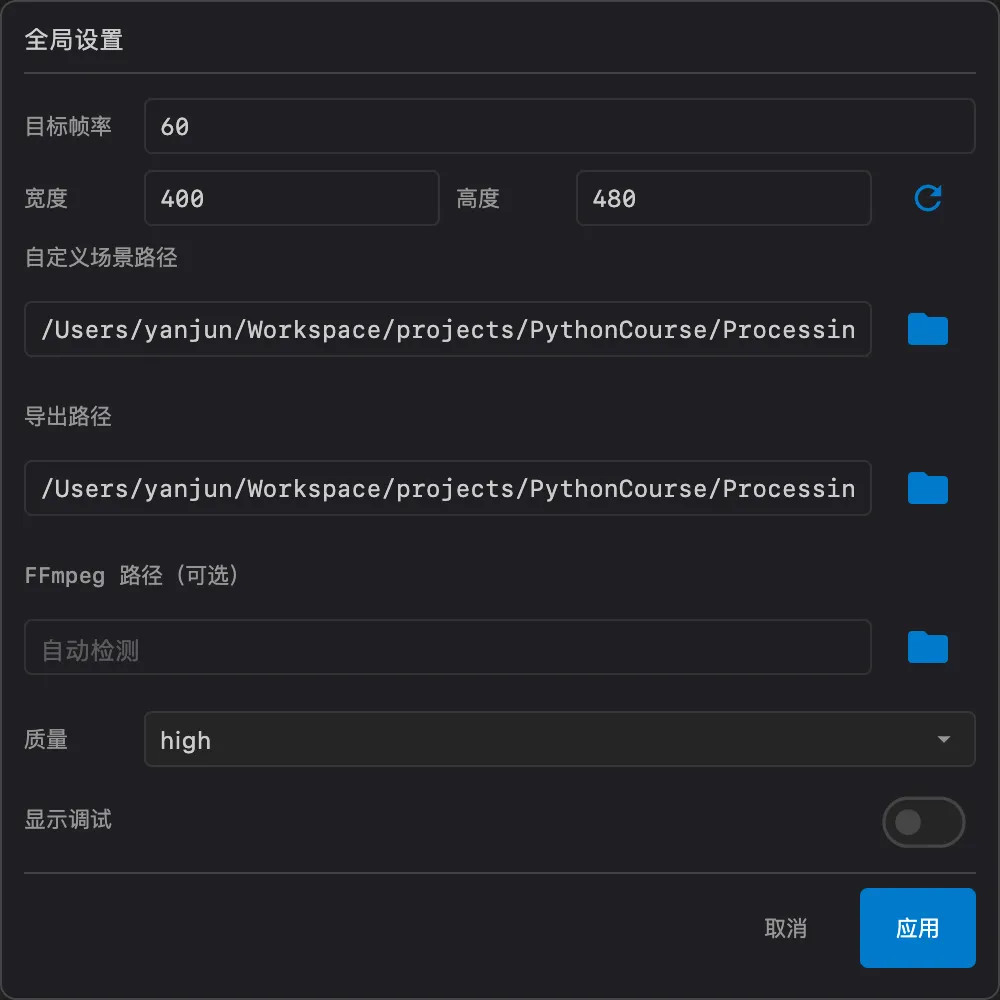
- Frame rate (fps): default 60.
- Width / Height (pixels): default example 400 × 480.
Click Record again to stop and export. The output format is MP4.
🎉 Done!
You have completed a full flow from creating a scene to exporting a video. This guide is a starting point — explore more models and timeline tricks to create complex visuals.
👉 Next: want a walkthrough of every UI control? See Interface Overview.